
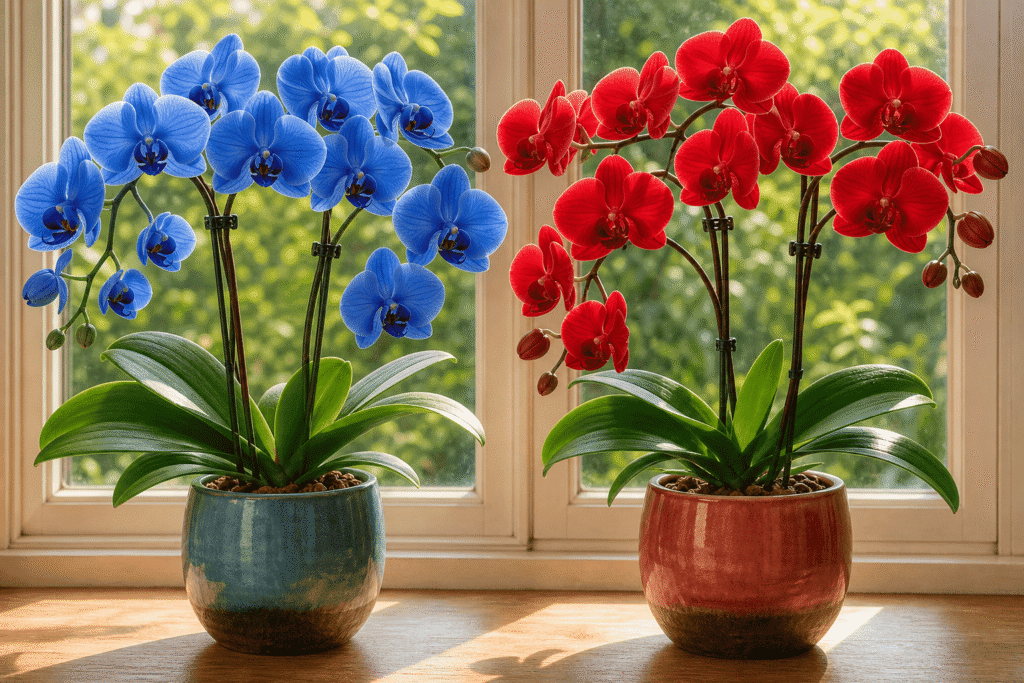
Learn how to water, light, feed, and repot a moth orchid without relying on a rigid calendar or confusing care myths.
Phalaenopsis orchids—commonly called moth orchids—are among the most popular flowering houseplants in the United States. Their elegant flowers can remain attractive for weeks or even months, and their temperature requirements generally suit an ordinary home.
Yet many beginners lose their first orchid within a year.
The usual problem is not neglect. It is well-intentioned care applied without understanding how the plant works. A new owner may water every Sunday whether the roots need it or not, leave the inner pot standing in decorative-container water, use ordinary potting soil, or move the plant into a dark corner after flowering.
These actions can slowly deprive the roots of oxygen. Once damaged roots can no longer supply enough water, the leaves wrinkle or droop. The owner then assumes that the plant is thirsty and waters more often—making the root problem worse.
Successful Phalaenopsis care becomes much easier when you stop following a fixed schedule and start reading the plant. Root color, pot weight, leaf condition, potting-medium moisture, temperature, and light together tell you what the orchid needs.
This guide gives you a practical, science-based system for making those decisions.
Quick Answer: How Do You Care for a Phalaenopsis Orchid?
For a healthy beginner Phalaenopsis:
- Give it bright, indirect light, such as filtered light near an east-facing window.
- Grow it in an orchid pot with drainage and ventilation—not ordinary garden soil.
- Water thoroughly when the potting medium is approaching dryness.
- Let all excess water drain before returning the plant to its decorative container.
- Keep water from remaining in the crown, especially overnight.
- Maintain comfortable household temperatures, generally around 65–85°F (18–29°C).
- Use a balanced orchid fertilizer at a diluted rate during active growth.
- Repot when the medium is decomposing, drainage has deteriorated, or roots are unhealthy.
- Inspect the leaves, crown, flower spikes, and roots regularly.
- Remember that flowers are temporary; healthy leaves and roots are the foundation of future blooms.
The American Orchid Society advises watering Phalaenopsis thoroughly and then waiting until the medium is nearly dry before watering again. Because conditions change with temperature, humidity, pot size, medium, and season, there is no universally correct “once-a-week” schedule.
First Understand How a Phalaenopsis Grows
A Phalaenopsis is not built like a typical bedding plant.
Many Phalaenopsis species grow naturally as epiphytes, which means they attach themselves to trees without taking nutrients from the tree. Their roots are adapted to an airy environment where water arrives, drains away, and is followed by oxygen.
The roots are covered by a spongy outer tissue called velamen. Velamen helps absorb water and temporarily hold moisture around the root. It also explains why many healthy dry roots appear silver-gray and become green after watering.
This does not mean that every silver root automatically proves the plant needs water. Visible aerial roots can dry faster than roots inside the pot. Before watering, also check the medium and the weight of the pot.
Phalaenopsis orchids also lack the large pseudobulbs that many other orchids use to store water. They store some water in their thick leaves and roots, but they do not tolerate prolonged drought as well as orchids with substantial storage organs.
The goal is therefore not to keep a Phalaenopsis constantly wet or bone-dry. The goal is a repeating cycle:
Water thoroughly → drain completely → allow air to return to the root zone → water again as the medium approaches dryness.
That wet-to-nearly-dry cycle is the foundation of successful care.
Beginner’s Diagnostic Table
Use the following table as an initial guide. A single symptom may have several causes, so inspect the entire plant before taking action.
| What you observe | Most likely possibilities | What to check | First practical response |
| Roots are green and firm | Recently watered, adequately hydrated roots | Moisture deeper in the pot | Wait before watering if the medium is still moist |
| Roots are silver-gray but firm | Roots are dry or approaching dryness | Pot weight and moisture below the surface | Water if the medium is also nearly dry |
| Roots are brown or black, soft, hollow, or collapsing | Root death associated with poor aeration, old medium, or prolonged wetness | Drainage, odor, standing water and decomposed medium | Reduce unnecessary watering and assess whether repotting is required |
| Leaves are wrinkled or limp | Water shortage at the leaves, caused by either underwatering or damaged roots | Inspect roots before adding more water | Correct the root-zone problem rather than automatically watering more |
| One lowest leaf slowly yellows | Normal aging may be occurring | Condition of all other leaves and roots | Monitor; do not remove a firm leaf prematurely |
| Several leaves yellow rapidly | Root trouble, stress, excessive light, temperature injury, or disease | Roots, crown, recent environmental changes | Isolate the plant and identify the cause before fertilizing |
| Leaves are very dark green and the plant does not rebloom | Light may be insufficient | Distance from window and seasonal light level | Gradually provide brighter indirect light |
| Pale, bleached, or scorched-looking patches appear | Excessive direct sun or sudden light change | Heat and sun exposure at the window | Move out of harsh direct sun and acclimate gradually |
| Water remains in the crown | Increased risk of crown damage | Air movement and time of watering | Blot out the water and water earlier in the day |
| Buds shrivel and fall before opening | Environmental stress or “bud blast” | Drafts, sudden temperature change, root health and relocation | Stabilize conditions and avoid repeated moves |
| White cotton-like clusters appear | Possible mealybugs | Leaf joints, undersides and flower spikes | Isolate the plant and begin appropriate pest management |
| Hard brown or tan bumps appear | Possible scale insects | Leaves, midribs and flower spikes | Isolate and confirm the pest before treatment |
| White crust appears on the medium or pot | Fertilizer or mineral-salt accumulation | Water quality and fertilizer concentration | Flush thoroughly with suitable water and reduce fertilizer strength |
Weekly Five-Minute Orchid Check
Once a week, ask:
- Is the medium still moist below the surface?
- Does the pot feel noticeably lighter than it did after watering?
- Are the visible roots firm?
- Is the crown dry and free of debris?
- Are new roots or leaves developing?
- Are there insects, sticky deposits, spots, or spreading discoloration?
- Is the plant receiving bright indirect light?
- Is water trapped inside the decorative outer pot?
This short inspection is more useful than watering automatically every seven days.
Practical Step 1: Give the Orchid the Right Light
Phalaenopsis orchids need enough light to build leaves, roots, and the energy required for flowering. However, intense direct midday sun can overheat or scorch the leaves.
An east-facing window is often a good starting location because it provides gentle morning light. A bright north-facing position may work in some homes, while south- or west-facing windows may require a sheer curtain or greater distance between the plant and the glass.
Do not judge light only by how bright the room appears to you. Human eyes adapt well to dim interiors, but a position several feet from a window may be much darker than the windowsill.
Watch the plant over time:
- Very dark green leaves combined with weak growth or failure to rebloom may indicate inadequate light.
- Yellow-green, bleached, or hot leaves may indicate excessive light.
- Medium green leaves, steady root growth, and new leaf production generally suggest that the plant is adapting well.
Change light levels gradually. A plant moved abruptly from a store display or shaded room into strong direct sun may be damaged before it can acclimate.
Practical Step 2: Water by Evidence, not by the Calendar
Before watering, check at least two indicators:
- Pot weight: A nearly dry pot feels lighter than a freshly watered pot.
- Medium moisture: Insert a wooden skewer into the medium for several minutes or carefully feel below the surface.
- Root appearance: In a clear pot, roots often become less green and more silver as they dry.
- Time since the last watering: Use this only as supporting information, not as the final decision.
When watering is needed:
- Take the orchid out of its decorative outer container.
- Place it over a sink.
- Apply room-temperature or lukewarm water thoroughly across the medium.
- Allow the entire root zone to become evenly moistened.
- Let the pot drain completely.
- Check that no water is trapped between the leaves or in the crown.
- Return the orchid only after drainage has stopped.
The University of Maryland Extension recommends thoroughly wetting the bark and roots and allowing the pot to drain completely. It also notes that misting usually does not provide enough water for an indoor orchid.
Avoid letting the pot stand continuously in water. Roots need both moisture and oxygen. Permanently saturated medium fills air spaces and encourages root decline.
Ice cubes are not necessary. Room-temperature water gives you better control over how completely and evenly the root zone is wetted. The University of California Master Gardeners advise using room-temperature water, allowing full drainage, and avoiding ice cubes.
Practical Step 3: Use an Airy Pot and Orchid Medium
Never plant a Phalaenopsis in ordinary garden soil. Fine, compacted soil holds too much water around roots that require substantial aeration.
Suitable orchid media may include:
- Medium or fine orchid bark
- Sphagnum moss
- Perlite
- Horticultural charcoal
- Other coarse, stable components designed for orchids
No single medium is best for every home.
Bark usually drains quickly and may need more frequent watering. Tightly packed sphagnum moss can hold water much longer, which is useful in some dry environments but risky for beginners who water frequently. A small pot of moss may remain wet deep inside even when the surface appears dry.
A clear plastic orchid pot is helpful because it allows you to observe roots and moisture. It should have ample drainage holes. A decorative cachepot can be used outside it, provided no water is allowed to collect at the bottom.
Do not repot merely because aerial roots are growing outside the container. Aerial roots are normal. Repot when:
- The medium has decomposed and stays wet too long.
- Drainage or aeration has deteriorated.
- Many roots inside the pot are dead.
- The plant is unstable.
- The pot is badly overcrowded.
- There is a persistent sour or decaying smell.
Repotting is usually easiest after flowering or when fresh root growth begins. Use clean tools, remove decomposed medium, and trim only roots that are clearly dead, hollow, mushy, or severely damaged. Choose a pot that fits the remaining root system; an oversized pot may hold excessive moisture.
Practical Step 4: Maintain Suitable Temperature and Air Movement
Most common Phalaenopsis hybrids are comfortable at ordinary indoor temperatures.
A useful general range is:
- Nights: approximately 60–70°F (16–21°C)
- Days: approximately 70–85°F (21–29°C)
Protect plants from heating vents, air-conditioner drafts, cold window glass, and rapid temperature changes. Budded plants are particularly sensitive to sudden environmental disruption.
Gentle air movement helps moisture evaporate from leaves and improves conditions around the roots. The goal is not a strong fan blowing constantly at the flowers. A small fan operating gently nearby, together with normal room ventilation, is often sufficient.
Humidity can be beneficial, but increasing humidity without providing air movement can create problems. For most beginners, healthy roots, correct watering, and suitable light matter more than trying to maintain greenhouse-level humidity in a living room.
If you use a humidity tray, keep the orchid pot above the water rather than standing in it.
Practical Step 5: Fertilize Lightly
Fertilizer supports growth, but it cannot compensate for poor roots, inadequate light, or incorrect watering.
Use a complete, balanced orchid fertilizer that includes micronutrients. Follow the label, but begin conservatively—often at one-quarter to one-half of the label rate. Apply it during active root and leaf growth rather than giving occasional heavy doses.
A simple beginner schedule is:
- Fertilize lightly every two to four waterings during active growth.
- Use plain water periodically to flush accumulated salts through the pot.
- Reduce feeding when growth slows, light is low, or roots are unhealthy.
- Never increase fertilizer simply because the plant has not flowered.
Apply fertilizer to moist or recently watered roots rather than badly dehydrated roots. Excess fertilizer can damage root tips and leave a white mineral crust on the medium or pot.
Iowa State University Extension recommends periodic flushing with plain water to reduce salt accumulation.
Practical Step 6: Manage the Plant After Flowering
A finished flower display does not mean the orchid is dying. Flowering is only one stage of its growth cycle.
After the flowers fall, examine the spike:
- If it remains green, you may leave it temporarily or cut above a healthy node in the hope of a side branch.
- If it becomes yellow or brown, cut it near the base with a clean tool.
- If the plant is small, weak, or recovering from root loss, cutting the spike near the base allows it to direct more resources toward leaves and roots.
A secondary branch may flower sooner, but the display is not guaranteed and may be smaller. Allowing the plant to rebuild before producing a completely new spike can result in a stronger future display.
Continue normal care after flowering. Do not move the plant permanently into a dark location just because it no longer has flowers.
Common Phalaenopsis Care Mistakes
1. Watering on the same day every week
A calendar cannot measure moisture. A plant may dry in four days during warm, bright weather and take considerably longer during cool, cloudy conditions.
Better approach: Check the roots, medium, and pot weight before watering.
2. Confusing dehydration with underwatering
Wrinkled leaves mean that insufficient water is reaching the leaves. That can happen because the plant has not been watered—or because rotten roots can no longer absorb water.
Better approach: Inspect the roots before changing your watering frequency.
3. Leaving water in the outer pot
The grower waters correctly but returns the draining inner pot to a sealed container where the roots sit in collected water.
Better approach: Empty the outer pot every time.
4. Using ordinary potting soil
Fine soil reduces air around the roots and usually remains wet too long.
Better approach: Use a purpose-made, airy orchid medium.
5. Keeping the orchid in insufficient light
A Phalaenopsis may remain alive in dim light but fail to produce enough energy to rebloom.
Better approach: Provide bright indirect light and make gradual adjustments.
6. Pouring water into the crown
Water trapped at the growing point can encourage crown damage, particularly when it remains there overnight.
Better approach: Water in the morning and blot out trapped water.
7. Overfertilizing a struggling plant
Fertilizer is sometimes treated as plant medicine. Damaged roots, however, are more vulnerable to fertilizer salts.
Better approach: Restore suitable root conditions first, then resume light feeding after active growth appears.
8. Repotting into an oversized container
A large volume of medium dries slowly and can keep the center of the pot wet.
Better approach: Select the smallest pot that comfortably contains the healthy roots.
9. Cutting healthy aerial roots
Aerial roots are part of the living plant and may help with water absorption and anchorage.
Better approach: Leave firm roots intact unless they are clearly dead or damaged.
10. Expecting continuous flowers
Phalaenopsis orchids need time to grow leaves and roots between flowering cycles.
Better approach: Measure success by healthy growth, not by flowers every day of the year.
Frequently Asked Questions
How often should I water my Phalaenopsis?
There is no fixed interval that works everywhere. Many indoor orchids may need water around once a week, but the actual interval can be shorter or much longer. Water when the medium is approaching dryness—not simply because a certain number of days has passed.
Should I water my orchid with three ice cubes?
A thorough watering with room-temperature or lukewarm water is a more controllable method. It moistens the root zone evenly and allows accumulated salts to drain from the pot.
What color should healthy roots be?
Healthy roots are normally firm. They may look green when wet and silver-gray when dry. Some healthy roots may also be pale yellow or cream if they have grown inside a dark potting medium and contain less chlorophyll. Texture and firmness are often more informative than color alone.
Why are my orchid’s leaves wrinkled?
The leaves are not receiving enough water. Check whether the medium has remained dry too long and whether the roots are healthy. If most roots are soft, hollow, or dead, watering more frequently will not solve the underlying problem.
Is one yellow bottom leaf normal?
An older lowest leaf may gradually yellow and fall as part of normal aging. Rapid yellowing of several leaves, yellowing from the crown, or yellowing accompanied by root decline requires investigation.
Why is my Phalaenopsis growing leaves but not flowering?
Insufficient light is a common reason. Other possibilities include an immature plant, weak roots, excessive stress, or a lack of an appropriate seasonal temperature change. Improve overall plant health before trying to force flowering.
Can I grow a Phalaenopsis in a bathroom?
Only if it receives adequate light and air movement. Humidity alone cannot replace light, healthy roots, and proper watering.
Should I mist the leaves every day?
Routine misting is usually unnecessary and may leave water in the crown or leaf joints. Water the root zone properly. If indoor humidity is very low, improve the surrounding environment while maintaining gentle air movement.
When should I repot a newly purchased orchid?
If the medium drains well, the roots appear healthy, and the plant is flowering, you can usually wait. Repot sooner if the medium smells sour, remains wet for an unusually long time, contains numerous dead roots, or the plant is unstable.
Can a Phalaenopsis recover after losing its flowers?
Yes. Flower loss is normally the end of the display, not the end of the plant. Continue caring for its leaves and roots so it can build the energy needed for its next flowering cycle.
Your Beginner Care Plan
For the next four weeks, keep the process simple:
- Place the orchid in bright, indirect light.
- Confirm that its pot drains freely.
- Check moisture rather than watering automatically.
- Water thoroughly only when the medium approaches dryness.
- Drain the plant completely.
- Keep the crown dry.
- Inspect the roots and leaves once a week.
- Record the watering date and what you observed.
- Avoid repotting, fertilizing heavily, or moving the plant repeatedly unless there is a clear problem.
- Look for new root tips or a developing leaf—these are valuable signs of progress.
Once you understand how quickly your particular pot dries in your particular home, care becomes much more predictable.
Join the Orchid Bloom Lab email list to receive practical, science-based orchid care guidance and downloadable diagnostic resources. You will learn what to inspect, what the signs may mean and what to do next—without relying on guesswork.
Join the email list at https://orchidbloomlab.com
You can also subscribe to the Orchid Bloom Lab YouTube channel for clear visual guidance on watering, root health, repotting, lighting, flowering and rescuing troubled orchids.
Subscribe at https://www.youtube.com/@OrchidBloomLab
Orchid Bloom Lab™
Science-Based Orchid Flowering Tips—Grow Better. Bloom More.