
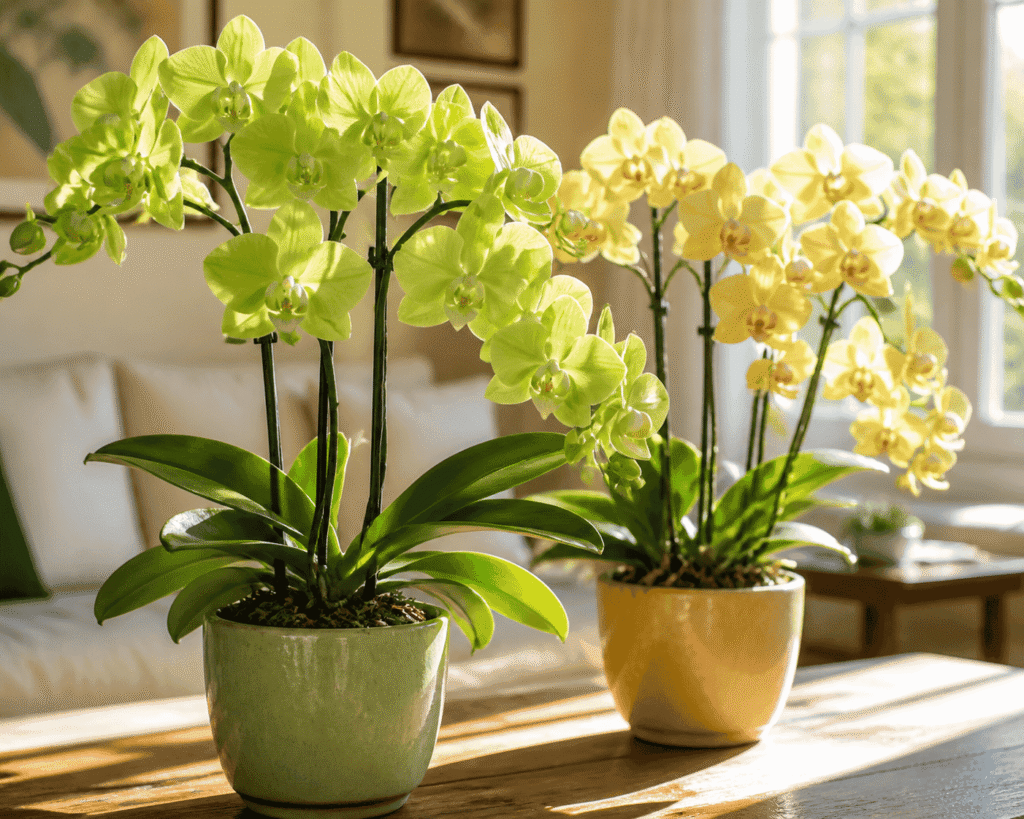
A supermarket Phalaenopsis orchid can look perfect above the pot.
Its flowers are fresh, its leaves are glossy and its decorative container matches your home. But beneath the flowers, a second story may be developing—one that is much harder to see.
Inside the pot, you may find healthy green roots and suitable growing material. You may also discover tightly packed moss, a dense nursery plug, decomposed bark, standing water, dead roots or even hidden pests.
This does not mean that supermarket orchids are poor-quality plants. Many are produced by skilled commercial growers under carefully managed greenhouse conditions. The problem begins when a potting system designed for rapid commercial production enters a home with different light, temperature, humidity and watering habits.
A medium that worked well in a warm, bright greenhouse may stay wet far too long on a cool indoor windowsill.
Before you water your new orchid—or rush to repot it—take a closer look at what is hidden inside its pot.
Quick Answer: What Might Be Inside the Pot?
A supermarket Phalaenopsis pot may contain:
- A clear or opaque plastic nursery pot
- Sphagnum moss, bark or a mixture
- A dense propagation plug around the oldest roots
- Healthy green, silver, cream or yellow roots
- Soft, hollow or dead roots
- Decomposed growing material
- Standing water inside a decorative outer pot
- Mineral or fertilizer deposits
- Algae
- Fungus gnats or other pests
- A plastic support cage, stake or clip
- More than one plant or root system
Not every hidden item is harmful. The important question is whether the roots receive an appropriate balance of water and air in your home.
Why the Flowers Can Look Healthy While the Roots Are Failing
A flowering Phalaenopsis may appear healthy even when some of its roots are already declining.
The plant can use stored water and energy from its leaves and remaining roots to support its flowers. Root trouble may therefore remain hidden until later.
By the time the leaves become limp or yellow, the orchid may have lost a significant part of its functioning root system.
This is why flowers alone are not a reliable health test.
When choosing or caring for an orchid, look at:
- Roots
- Leaves
- Crown
- Potting medium
- Drainage
- Pot size
- Moisture level
The flowers matter, but they are only one part of the plant.
Why Supermarket Orchids Are Potted Differently
Commercial orchid growers need to produce thousands of uniform plants efficiently.
The potting system must work with:
- Automated or carefully controlled watering
- Bright greenhouse light
- Warm temperatures
- Strong air movement
- Predictable humidity
- Regular fertilizer applications
- Fast plant growth
- Safe transport to stores
Your home may provide much less light, cooler temperatures and slower airflow. You may also water differently.
As a result, the growing material may dry much more slowly after purchase.
The potting system is not necessarily “bad.” It may simply be poorly matched to its new environment.
Hidden Item 1: A Clear Nursery Pot Inside a Decorative Pot
Many supermarket orchids are sold using a pot-within-a-pot system.
The orchid grows in a plastic nursery pot with drainage holes. That pot sits inside a ceramic, plastic or metal decorative container.
This arrangement can be useful. The inner pot supports drainage and may allow you to inspect the roots. The outer pot improves the appearance and catches drips.
The danger is hidden standing water.
After watering, the inner pot may continue dripping into the outer container. If the water is not emptied, the bottom of the nursery pot may remain submerged.
Roots in the lower part of the pot then receive less oxygen and may begin to decline.
What to do
Lift the nursery pot out of the decorative container.
Check for:
- Standing water
- A sour or stale smell
- Constant condensation
- Soft lower roots
- A pot that remains wet for many days
Always water the orchid where excess water can drain freely. Return it to the decorative pot only after it has finished draining.
Hidden Item 2: Tightly Packed Sphagnum Moss
Sphagnum moss is not automatically harmful.
It can be an excellent orchid-growing material because it holds water while still providing air when used correctly. It is particularly useful in warm, bright or dry conditions.
The risk appears when moss is packed very tightly or watered too frequently.
The outside may feel dry while the center remains wet. A beginner touches the surface, assumes the orchid is thirsty and adds more water. The inner roots stay constantly wet.
Signs of overly wet moss
- The pot remains heavy for a long time.
- Condensation is always visible.
- The center feels cool and damp many days after watering.
- Roots near the outside look healthy while inner roots are declining.
- Leaves become limp despite wet medium.
- Fungus gnats appear.
- The moss smells stale.
What to do
Do not water based only on the dry surface.
Check deeper in the pot and observe its weight. If you are uncertain, wait another day and check again.
If the moss is old, compressed or drying far too slowly in your conditions, repotting into fresh material may be appropriate.
Hidden Item 3: A Dense Nursery Plug
One of the most surprising discoveries can be a small, dense plug at the center of the pot.
Young orchids are often started in compact propagation material. As the plant grows, it may be transferred into a larger pot without completely removing that original core.
The outer pot may contain bark or loose moss, while the oldest roots remain surrounded by a dense inner plug.
This creates two different moisture zones:
- The outer medium may appear dry.
- The inner plug may still be wet.
A grower waters because the visible bark is dry, but the hidden center receives more water before it has dried sufficiently.
Is every plug dangerous?
No.
A plug can work well when watering, light, temperature and airflow are correctly matched to it. Removing a plug carelessly can also damage healthy roots growing through it.
The issue is not simply that a plug exists. The issue is whether it remains wet too long or is causing root decline in your conditions.
What to do
If the orchid is healthy and the pot dries at a reasonable rate, immediate action may not be necessary.
If the plant shows root trouble or the center stays wet far longer than the outer medium, inspect it during repotting. Carefully loosen or remove material that is clearly trapping excess moisture without tearing healthy roots unnecessarily.
Hidden Item 4: Healthy Roots of Several Colors
Beginners often expect every healthy orchid root to be bright green.
In reality, viable roots may be:
- Green when wet
- Silvery-gray when dry
- Cream or white
- Pale yellow
- Light brown from staining
- Green or reddish at the growing tip
Roots that grew without exposure to light may remain cream or yellow. They can still function normally.
The most important test is firmness.
A healthy root generally feels firm and full. A dead root may be hollow, flat, mushy or covered by an outer layer that slips away easily.
What not to do
Do not cut a root simply because it is yellow, brownish or unattractive.
During repotting, preserve every root that remains firm. A struggling orchid needs its functioning roots.
Hidden Item 5: Dead or Decaying Roots
An orchid can contain both living and dead roots.
Some root loss may have occurred before purchase because of transport, changing moisture conditions or aging potting material. The plant may still be healthy overall if it has enough functioning roots.
Signs of dead roots
- Soft or mushy texture
- Hollow center
- Flat, papery appearance
- Very dark tissue
- Outer covering that slips away
- Complete dryness and brittleness
Why hidden dead roots matter
Dead roots do not recover. They can collapse into the medium, reduce air spaces and make moisture management more difficult.
If many roots have died, the leaves may become limp or wrinkled because the remaining system cannot supply enough water.
This can happen even when the pot is wet.
What to do
If widespread root loss is suspected, remove the plant from the pot and inspect it.
Use a clean cutting tool to remove roots that are clearly dead. Keep all firm roots, even if their color is imperfect.
Repot in fresh, airy orchid medium and choose a pot that fits the remaining root system.
Hidden Item 6: Decomposed Bark
Fresh orchid bark has relatively large pieces and air spaces.
Over time, it breaks down into smaller particles. The medium becomes denser and holds water longer.
A watering routine that was safe when the bark was fresh can become too frequent as the medium ages.
Signs that bark has broken down
- Pieces crumble when pressed.
- Fine particles collect at the bottom.
- Water drains slowly.
- The pot stays wet longer than before.
- The medium smells sour or stale.
- Roots are declining.
- The orchid becomes loose in its pot.
When bark has lost its structure, simply watering less often may not solve the basic problem. The root zone has already lost some of its air space.
Fresh medium may be needed.
Hidden Item 7: Mineral and Fertilizer Buildup
White or pale deposits may appear on:
- Pot rims
- Bark
- Moss
- Roots
- Drainage holes
- Decorative containers
These deposits can come from fertilizer or minerals in the water.
A small amount does not automatically mean the orchid is in danger. Heavy accumulation, however, can injure root tips and interfere with water uptake.
What to do
Water thoroughly enough for some water to drain through the pot. This helps flush accumulated salts.
Use fertilizer at a modest concentration according to its directions. Do not apply a strong dose in an attempt to force flowers.
If deposits continue accumulating, investigate your water quality and fertilizer routine.
Hidden Item 8: Algae
Green algae sometimes develops inside clear pots exposed to light.
A small amount is usually more unattractive than dangerous. However, heavy algae growth may indicate that the medium remains wet for long periods.
Algae can also make root inspection more difficult.
What to do
Review how quickly the pot dries, but do not repot solely because a little algae is visible.
You can place the clear nursery pot inside an opaque decorative container between waterings, provided drainage and airflow remain adequate.
Hidden Item 9: Pests
Some orchid pests remain hidden around:
- Leaf joints
- Flower buds
- Stakes and clips
- Pot rims
- Drainage holes
- Root zones
- The base of the plant
Possible signs include:
- White cotton-like material
- Sticky deposits
- Small raised brown bumps
- Fine webbing
- Tiny moving insects
- Damaged flowers
- Distorted new growth
Fungus gnats may also appear when potting material remains continuously moist. Adult gnats are annoying, but their presence also suggests that moisture conditions should be reviewed.
What to do
Keep a newly purchased orchid separate from your established plants for an observation period.
Inspect it under bright light, including the lower surfaces of leaves and the spaces around stakes and clips.
Identify any pest before selecting a treatment. Do not spray several products without knowing what you are treating.
Hidden Item 10: A Pot That Is Too Large—or Too Small
A pot should fit the root system, not the flower display.
A very large pot contains more medium and generally dries more slowly. If the root system is small, the center may remain wet for too long.
A very tight pot is not automatically a problem. Phalaenopsis orchids often grow well when their roots fit closely.
Roots growing outside the pot do not necessarily mean that a larger container is needed. Aerial roots are normal.
What to do
Choose a new pot based on the healthy roots present during repotting.
Do not place a weakened orchid with only a few roots into a large container filled with moisture-retentive material.
Hidden Item 11: More Than One Moisture Zone
Even without a nursery plug, different parts of the pot may dry at different speeds.
For example:
- The surface may be dry.
- The center may remain moist.
- The bottom may stay wet.
- Aerial roots may dry quickly.
- Roots pressed against the pot may look drier than hidden roots.
This is why checking only the top of the pot can be misleading.
Use a combination of root color, pot weight, condensation and medium condition before watering.
Should You Repot a Supermarket Orchid Immediately?
Not necessarily.
Automatic repotting can damage roots, disturb the plant and shorten its flower display. However, waiting can also be risky when the root zone is failing.
The correct decision depends on what you find.
You may be able to wait until flowering ends if:
- Most roots look firm.
- The pot drains freely.
- The medium dries at a manageable rate.
- There is no unpleasant smell.
- Leaves remain firm.
- No pests are visible.
- The plant is stable.
- There is no standing water.
Consider repotting sooner if:
- Many roots are soft or hollow.
- The medium is badly decomposed.
- The pot has inadequate drainage.
- The orchid sits constantly in water.
- The central plug remains wet for an excessive period.
- The plant is loose because roots have died.
- The medium smells sour.
- Serious pests are present in the pot.
- The crown has been planted too deeply.
- Rapid decline is occurring.
Repotting a flowering orchid may cause flowers or buds to fall. But flowers are temporary. If the root system is in immediate danger, protecting the plant may be more important than preserving the current display.
The First 48 Hours with a New Supermarket Orchid
Step 1: Do not water automatically
The orchid may already be wet. Inspect it first.
Step 2: Remove decorative wrapping
Plastic sleeves and tight wrapping can reduce airflow and hide water around the pot.
Step 3: Lift out the nursery pot
Check whether water has accumulated inside the decorative container.
Step 4: Inspect the visible roots
Look for firmness, active green tips and signs of damage.
Step 5: Examine the leaves and crown
Check both leaf surfaces, the central growing point and the spaces around leaf bases.
Step 6: Inspect for pests
Pay special attention to flowers, buds, clips, stakes and pot rims.
Step 7: Choose a suitable location
Provide bright, indirect light away from heating vents, air-conditioning drafts and harsh sunlight.
Step 8: Keep it separate
Do not immediately place it among established orchids. Give yourself time to observe hidden pests or developing symptoms.
Step 9: Record its condition
Take photographs of the whole plant, roots, flowers and pot. These provide a useful comparison if something changes.
A Supermarket Orchid Inspection Table
| What you find | What it may mean | Suggested response |
| Firm green or silver roots | Functioning root system | Continue careful observation |
| Firm cream or yellow roots | Healthy roots grown without light | Preserve them |
| Soft, hollow roots | Dead or decaying roots | Inspect and repot if widespread |
| Tightly packed moss | High moisture retention | Check the center before watering |
| Dense inner plug | Different inner drying rate | Monitor or address during repotting |
| Standing water | Reduced oxygen around lower roots | Drain and empty outer pot |
| Crumbling bark | Decomposed medium | Plan to repot |
| White deposits | Mineral or fertilizer accumulation | Review flushing, water and feeding |
| Green algae | Light plus persistent moisture | Review drying time |
| Sour smell | Decomposition or root trouble | Inspect promptly |
| White cotton-like material | Possible mealybugs | Isolate and identify |
| Sticky deposits | Possible pests or plant secretions | Inspect closely |
| Healthy root tips | Active growth | Protect from damage |
| Dry brown flower spike | Completed flowering structure | Remove if completely dead |
How to Repot After the Inspection
If repotting is necessary, gather:
- A clean, well-drained orchid pot
- Fresh orchid medium
- A clean cutting tool
- Plant labels
- A clean work surface
- A stake or support if needed
Then:
- Remove the orchid gently from its pot.
- Loosen and remove the old medium.
- Examine every root by sight and touch.
- Trim only roots that are clearly dead.
- Preserve firm roots.
- Select a pot suited to the remaining root system.
- Position the crown above the medium.
- Add fresh medium without packing it excessively tightly.
- Stabilize the orchid.
- Adjust watering to the new medium.
Do not assume that the new mix will dry at the same rate as the old one.
Common Mistakes After Bringing the Orchid Home
Watering immediately
The center of the pot may already be saturated.
Leaving the nursery pot in standing water
Always check inside the decorative container.
Repotting a healthy plant out of fear
Investigate first. Not every nursery plug or moss-filled pot is causing harm.
Refusing to repot a failing plant because it is flowering
If roots are rapidly declining, the long-term plant may matter more than the temporary flowers.
Cutting every yellow or brown root
Color alone does not determine whether a root is dead. Test firmness.
Moving directly into a much larger pot
Large pots can remain wet too long around a small root system.
Using ordinary houseplant soil
Phalaenopsis roots need an airy orchid medium.
Adding fertilizer immediately
A newly purchased plant does not need a strong “welcome” feeding. Allow it to adjust and assess its root health first.
Placing it with other plants immediately
An observation period protects your existing collection from hidden pests.
Following the store’s watering label without checking
General instructions cannot account for your light, temperature, potting medium and indoor conditions.
Frequently Asked Questions
Are supermarket orchids poor-quality plants?
Not necessarily. Many are healthy, well-grown plants. The production medium and potting system may simply behave differently after the orchid enters a home.
Is tightly packed moss always bad?
No. Moss can be an excellent medium under suitable conditions. Problems arise when it stays wet too long or is watered again before the center has dried sufficiently.
Should I remove the nursery plug?
Only if it is causing moisture problems or root decline. Remove it carefully during repotting without tearing healthy roots.
Should I repot while the orchid is flowering?
Wait if the roots and medium are healthy. Repot sooner if serious root trouble, failed medium, poor drainage or pests threaten the plant.
Will repotting make the flowers fall?
It can shorten the flower display, especially if roots are disturbed. However, saving a declining root system may be more important.
Are yellow roots dead?
Not automatically. Roots grown without light may be cream or yellow. Firmness is more informative than color.
Why is the surface dry while the pot is still heavy?
The center or bottom of the medium may still contain considerable moisture.
Why are the leaves wrinkled even though the pot is wet?
The roots may be damaged and unable to absorb water. More water may worsen the problem.
Can I leave the orchid in its decorative pot?
Yes, if the inner pot drains freely and you empty all collected water after watering.
What should I do with aerial roots?
Leave firm aerial roots attached. They are normal and do not prove that the plant needs a larger pot.
How long should I keep a new orchid separate?
There is no perfect universal period. Keep it apart long enough to inspect it repeatedly and confirm that no pests or suspicious symptoms are developing.
Should I fertilize my new supermarket orchid?
First allow it to adjust and inspect its roots. When the plant is healthy and actively growing, use fertilizer modestly according to the label.
The Real Surprise Inside the Pot
The most important hidden discovery may not be a nursery plug, dead root or pest.
It may be the realization that an orchid’s health cannot be judged by its flowers alone.
A beautiful supermarket Phalaenopsis can have a strong root system and remain healthy for years. Another may need its watering routine adjusted or its medium replaced. The difference becomes clear only when you inspect below the display.
Do not assume that every supermarket orchid requires emergency repotting. But do not ignore what you cannot see.
Lift the inner pot. Check for standing water. Examine the roots. Learn what medium is present. Observe how long it stays wet.
Those few minutes can help turn a temporary flowering purchase into a plant that grows and blooms again.
Join the Orchid Bloom Lab email list to receive practical, science-based orchid care guidance and downloadable diagnostic resources. You will learn what to inspect, what the signs may mean and what to do next—without relying on guesswork.
Join the email list at https://orchidbloomlab.com
You can also subscribe to the Orchid Bloom Lab YouTube channel for clear visual guidance on watering, root health, repotting, lighting, flowering and rescuing troubled orchids.
Subscribe at https://www.youtube.com/@OrchidBloomLab
Orchid Bloom Lab™
Science-Based Orchid Flowering Tips—Grow Better. Bloom More.