
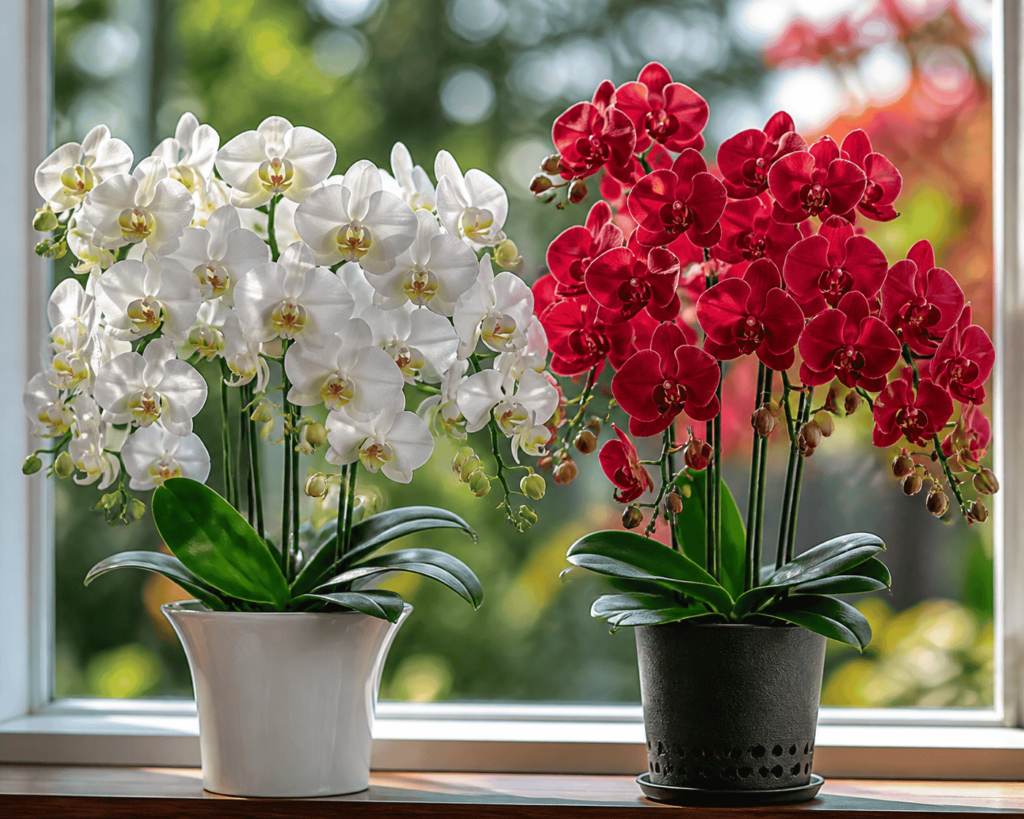
Your Phalaenopsis orchid has wrinkled, limp leaves. The obvious response seems to be giving it more water.
But stop before reaching for the watering can.
Wrinkled leaves mean that the orchid is not receiving enough water internally. They do not tell you why.
The pot may be too dry because the orchid has not been watered often enough. But the pot may also be wet while damaged roots are unable to absorb water. In that situation, watering again can make the root problem worse.
This is one of the most important lessons in moth-orchid care:
A dehydrated-looking orchid is not always a dry orchid.
Before deciding what to do, inspect the roots, growing medium and pot. The condition below the surface will tell you whether the plant needs water—or needs help recovering its roots.
Quick Answer: Should You Water Wrinkled Orchid Leaves?
Do not water based on the leaves alone.
First, check the pot.
Water may be needed when:
- The potting medium is approaching dryness.
- The pot feels light.
- There is little or no condensation inside the clear pot.
- Most roots are firm and silvery.
- The orchid has not been watered for an unusually long time.
- Bark has become dry throughout the pot.
Root damage is more likely when:
- The potting medium is still wet.
- The pot feels heavy.
- Condensation remains for many days.
- Roots are brown, soft, hollow or flat.
- The medium smells sour or stale.
- Water is standing inside the decorative container.
- Leaves continue wrinkling despite frequent watering.
- The plant is loose because many roots have died.
If the pot is wet and the roots are damaged, more water is not the solution.
Why Healthy Phalaenopsis Leaves Are Firm
Phalaenopsis leaves store water and contribute to photosynthesis. A well-hydrated leaf normally feels firm and holds its shape.
When the plant loses more water than its roots can replace, pressure inside the leaf cells falls. The leaf becomes less firm and may develop folds, lines or a leathery texture.
This internal water shortage can arise in two main ways:
- Too little water is available around healthy roots.
- Water is present, but damaged roots cannot absorb and transport it.
The leaves may look similar in both cases. That is why you must inspect the root zone before acting.
Think of Roots as the Orchid’s Water-Delivery System
Watering the pot does not guarantee that water reaches the leaves.
The roots must be alive and functioning.
A Phalaenopsis root has a sponge-like outer covering called velamen. This tissue helps absorb water and protect the living inner part of the root.
Healthy roots are generally firm. They may appear:
- Green when hydrated
- Silvery-gray when drier
- Cream or yellow if they grew without light
- Lightly brown from staining
- Bright green or reddish at an active growing tip
Damaged roots may become:
- Soft
- Hollow
- Flat
- Mushy
- Very dark
- Brittle
- Covered by an outer layer that slips away
When much of the root system has died, the remaining roots may be unable to supply all the leaves—even if the medium is constantly wet.
The Two Main Causes of Wrinkled Leaves
Cause 1: Genuine underwatering
This occurs when healthy roots do not receive enough water.
Possible reasons include:
- Watering too infrequently
- Very coarse bark that dries rapidly
- A small pot in a warm room
- Bright light and active plant growth
- Strong air movement
- Low humidity
- A long absence or missed watering
- Old bark that has become difficult to wet evenly
In this situation, the roots are generally firm but dry. The medium is light and approaching dryness.
A thorough watering may be appropriate.
Cause 2: Damaged or insufficient roots
This occurs when the root system cannot deliver enough water to the leaves.
Possible causes include:
- Prolonged wetness
- Compacted sphagnum moss
- Decomposed bark
- Poor drainage
- Standing water inside a decorative pot
- An oversized pot
- Root damage during repotting
- Fertilizer-salt injury
- Severe previous dehydration
- Root pests or disease
- Too few remaining roots for the size of the plant
In this situation, the medium may be wet, but the leaves remain dehydrated because the roots are not functioning.
Quick Diagnostic Table
| What you observe | More likely explanation | What to do next |
| Wrinkled leaves, dry medium and firm silver roots | Underwatering | Water thoroughly and drain |
| Wrinkled leaves, wet medium and soft roots | Root damage | Inspect and correct the root zone |
| Pot remains wet for many days | Poor airflow, compacted medium or oversized pot | Review pot, medium and conditions |
| Leaves wrinkle after repotting | Root disturbance or water imbalance | Stabilize plant and monitor new roots |
| Lower leaf wrinkles while newer leaves remain firm | Aging or limited root capacity | Inspect roots and observe progression |
| All leaves rapidly lose firmness | Serious water-supply failure | Inspect roots promptly |
| Roots are firm but bark repels water | Uneven hydration | Wet the medium thoroughly |
| Wrinkled leaves with dry root tips | Prolonged dryness or low moisture availability | Correct watering pattern |
| Wrinkled leaves with yellowing | Advanced water stress or root trouble | Inspect roots, crown and medium |
| New leaf is smaller than previous leaves | Reduced root function, light or general vigor | Review the entire growing system |
This table is a starting point. More than one factor may be involved.
A Five-Step Test Before You Water
Step 1: Lift the pot
A recently watered pot is heavier than a dry one.
If it still feels heavy, moisture probably remains inside. Do not assume that a dry-looking surface means the entire pot is dry.
Step 2: Look for condensation
Moisture droplets inside a clear pot indicate that water remains.
The absence of condensation does not prove that the center is completely dry, but persistent droplets are a reason to wait and inspect further.
Step 3: Examine the roots
Look through the pot.
Firm silver roots suggest dryness. Firm green roots suggest hydration. Soft or hollow roots suggest damage.
Color alone is not enough. A yellow root may still be healthy if it is firm.
Step 4: Check below the surface
Bark or moss may feel dry on top while remaining wet in the center.
If possible, inspect through the side of the clear pot. A clean wooden skewer inserted carefully into an open area can also help reveal hidden moisture, but avoid damaging roots.
Step 5: Smell the medium
Fresh orchid medium should not smell sour or stale.
An unpleasant smell can indicate deteriorated material, prolonged wetness or decaying roots.
If the Roots Are Healthy but Dry
If the medium is approaching dryness and the roots are firm, water the orchid thoroughly.
The correct method
- Remove the inner pot from its decorative container.
- Use room-temperature water.
- Wet the entire root zone evenly.
- Allow excess water to leave through the drainage holes.
- Check the crown and leaf joints for trapped water.
- Empty the decorative container.
- Return the orchid to bright, indirect light.
Do not give only a tiny splash. Thorough watering helps hydrate the root system evenly.
After watering, observe how quickly the pot dries. This will help you decide when to check again.
If the Medium Is Wet but the Leaves Are Wrinkled
This combination strongly suggests that the problem is not simply a lack of water in the pot.
The roots may be damaged, or the orchid may have too few functioning roots.
What to do
Remove the inner pot from its decorative container and check for standing water.
If the potting medium is decomposed, smells stale or conceals widespread root damage, repotting may be necessary.
During repotting:
- Remove the orchid gently.
- Clear away old or compacted medium.
- Inspect every root.
- Preserve firm roots.
- Trim only roots that are clearly dead.
- Use a clean cutting tool.
- Choose a pot that fits the remaining roots.
- Repot in fresh, airy orchid medium.
- Keep the crown above the medium.
- Stabilize the plant so new roots are not damaged.
Do not move a nearly rootless orchid into a large pot. A large volume of wet medium around a small root system can delay drying and cause further trouble.
Bark, Moss and Hidden Moisture
The potting material strongly influences how quickly an orchid dries.
Bark
Coarse bark provides good air spaces and usually dries relatively quickly.
However:
- New bark may initially resist wetting.
- Large pieces can leave some roots drier than others.
- Old bark decomposes and begins holding more water.
- A warm, bright location may cause rapid drying.
An orchid in bark may need more frequent checking than one in moss.
Sphagnum moss
Sphagnum moss holds much more water.
It can work very well when used loosely and managed carefully, but tightly packed moss may remain wet in the center long after its surface appears dry.
Do not judge moss by touching only the top.
A hidden nursery plug
Some orchids have a dense propagation plug around their oldest roots, even when the outer pot contains bark or loose moss.
The outer medium can dry while the inner plug remains wet. This creates confusing signals and can contribute to root decline.
If the orchid is struggling and the center remains wet for an excessive period, inspect for a hidden plug during repotting.
Why Watering More Can Make Wrinkling Worse
Suppose an orchid has ten roots, but eight have died from prolonged wetness.
The remaining two roots cannot supply enough water to all the leaves. The leaves begin to wrinkle.
The grower sees dehydration and waters more frequently. The medium stays wet, depriving the remaining roots of air. Those roots also decline.
The leaves then become even more wrinkled.
The correct response is not to keep adding water. It is to restore a healthy root environment and encourage new root growth.
This is why diagnosing before treating matters.
Can Wrinkled Leaves Become Smooth Again?
Sometimes—but not always.
A mildly dehydrated leaf may regain some firmness after the water problem is corrected. A severely wrinkled or long-damaged leaf may never return to its original appearance.
That does not mean the orchid is failing.
Older leaves may remain marked while the plant produces:
- New root tips
- A firm new leaf
- A stronger root system
- Improved future growth
Judge recovery mainly by new growth, not by whether an old leaf becomes perfect.
How Long Does Recovery Take?
A dry orchid with healthy roots may show improved firmness relatively soon after proper watering.
An orchid with extensive root damage can take much longer. It must first produce new roots before it can support stronger leaves.
Recovery may require weeks or months, depending on:
- The number of surviving roots
- The condition of the crown and stem
- Available light
- Temperature
- Season
- Potting medium
- Severity of the original damage
- Whether the cause has been corrected
Do not dig up the orchid repeatedly to check for progress. Photograph the visible roots and leaves every two weeks instead.
Other Reasons Leaves May Lose Firmness
Root condition and water supply are the main places to begin, but other factors can contribute.
Excessive heat
Hot leaves lose water more quickly. Strong direct sunlight through glass can raise leaf temperature and cause stress.
Move the plant away from harsh sun while maintaining bright, indirect light.
Very low humidity
Dry air can increase water loss, especially when temperatures are warm.
Moderate humidity may help, but do not compensate by keeping the pot constantly wet. Root health remains the priority.
Too much leaf area for the remaining roots
After major root loss, the small surviving root system may struggle to support all the leaves.
Do not automatically remove green leaves. The plant may gradually adjust by losing an old lower leaf as new roots develop.
Flowering stress
A heavily flowering orchid uses water and stored resources.
If the plant has very few roots, maintaining a large flower display may slow recovery. In a severely weakened plant, removing the flower spike may allow more resources to support roots and leaves.
Fertilizer-salt damage
Heavy fertilizer use can injure roots and reduce their ability to absorb water.
Look for white deposits on the medium, pot or roots. Flush the medium and reduce fertilizer strength. Do not fertilize heavily while the roots are damaged.
Recent repotting
Roots may have been disturbed, broken or moved into a medium with a different drying rate.
Stabilize the plant, avoid repeated repotting and learn how the new medium behaves.
Common Mistakes
Mistake 1: Watering immediately when leaves wrinkle
Inspect the roots and medium first.
Mistake 2: Watering every day until the leaves improve
Constant wetness can damage the roots that remain.
Mistake 3: Misting the leaves instead of watering the roots
Misting provides little useful water to the plant and can leave moisture in the crown or leaf joints.
Mistake 4: Soaking a rootless orchid indefinitely
Roots still require oxygen. Constant soaking can encourage further deterioration.
Mistake 5: Applying heavy fertilizer
Fertilizer cannot replace roots. Excess salts may injure weakened tissue.
Mistake 6: Removing every wrinkled leaf
A wrinkled green leaf may still contribute to the plant. Remove leaves only for a sound reason.
Mistake 7: Expecting old leaves to become perfect
Recovery is better measured by new roots and leaves.
Mistake 8: Placing the orchid in deep shade
A recovering plant needs energy from suitable light. Provide bright, indirect light without harsh sun.
Mistake 9: Using a large pot
A large pot may keep too much medium wet around a small root system.
Mistake 10: Changing several things at once
Repeated moves, treatments and repotting make it difficult to know what is helping.
A Practical Recovery Plan for Damaged Roots
1. Stop the cause
Correct standing water, failed medium, poor drainage or an unsuitable watering routine.
2. Preserve healthy tissue
Keep all firm roots and useful green leaves.
3. Repot only when necessary
If the medium and roots are healthy, repotting may add stress. If the root zone has failed, fresh medium is justified.
4. Match the pot to the roots
Use the smallest practical pot that comfortably accommodates the remaining root system.
5. Provide bright, indirect light
Light supplies the energy needed for new growth.
6. Maintain gentle airflow
Air movement helps wet surfaces and the medium dry appropriately.
7. Water according to actual conditions
Check before every watering. Do not follow a rigid timetable.
8. Keep the crown dry
Water trapped in the center of the plant creates a separate risk.
9. Fertilize lightly after active root growth begins
Do not force recovery with strong feeding.
10. Be patient
One new root tip is a meaningful success.
A Simple Seven-Day Observation Plan
Day 1: Document the symptoms
Photograph the leaves, roots, crown and medium.
Day 2: Inspect moisture
Check pot weight, condensation and the center of the medium.
Day 3: Review the environment
Assess light, temperature, airflow and proximity to heating or cooling vents.
Day 4: Examine roots closely
Decide whether the roots are firm and dry or soft and wet.
Day 5: Correct the main problem
Water if the healthy roots are dry. Repot if the medium has failed and roots are decaying.
Day 6: Leave the plant stable
Do not keep moving or disturbing it.
Day 7: Record the new baseline
Note what was changed and continue monitoring over the following weeks.
Seven days may be enough to diagnose and correct conditions, but it is usually not enough for a damaged orchid to grow a new root system.
Frequently Asked Questions
Do wrinkled orchid leaves always mean underwatering?
No. They mean that insufficient water is reaching the leaves. The cause may be dry medium or roots that cannot absorb water.
Should I water immediately?
Check the roots, medium and pot weight first. Water only if the root zone is approaching dryness and the roots are capable of functioning.
Why are the leaves wrinkled when the roots are green?
Some visible roots may be green while hidden roots are damaged. Green also indicates hydration, not necessarily perfect health. Check firmness and the full root system.
Why are the leaves wrinkled after repotting?
Roots may have been disturbed, or the new medium may hold water differently. Keep the plant stable and monitor new root growth.
Can aerial roots hydrate the orchid?
Yes, aerial roots are functional, but they may not be enough to support the entire plant if most potted roots have died.
Should I cut off wrinkled leaves?
Not merely because they are wrinkled. A green leaf can still be useful. Allow the plant to decide when an old leaf is no longer needed.
Will misting make the leaves firm again?
Misting does not adequately water the root system and may leave water in the crown. Correct the underlying root or watering problem.
Can I keep a rootless orchid in water?
Constant water exposure is not a universal rescue solution and can further reduce oxygen around vulnerable tissue. Focus on a stable, airy and appropriately moist recovery environment.
Should I remove the flower spike?
If the orchid is severely weakened and has very few roots, removing the spike may allow it to direct more resources toward recovery. A strong plant with only mild wrinkling may not require this.
How will I know that the orchid is recovering?
Look for a new root tip, new leaf or improved firmness in newer growth. Old wrinkled leaves may remain marked.
How long will recovery take?
A mildly dry orchid may respond relatively quickly. A plant with major root loss may need several months to rebuild.
The Answer Is Below the Leaves
Wrinkled Phalaenopsis leaves are easy to see, but the cause is usually found below them.
Before watering, ask:
- Is the potting medium dry or wet?
- Are the roots firm or damaged?
- Does the pot drain freely?
- Is water hidden inside the outer container?
- Has the medium decomposed?
- Can the remaining roots support the plant?
If the roots are firm and the medium is dry, water thoroughly and drain completely.
If the medium is wet and the roots are soft, more water may worsen the problem. Correct the root environment and help the plant produce new roots.
The most persuasive evidence of recovery will not necessarily be an old leaf becoming smooth. It will be the appearance of a healthy new root tip—the orchid rebuilding its water-delivery system from the ground up.
Join the Orchid Bloom Lab email list to receive practical, science-based Phalaenopsis orchid care guidance and downloadable diagnostic resources. You will learn what to inspect, what the signs may mean and what to do next—without relying on guesswork.
Join the email list at https://orchidbloomlab.com
You can also subscribe to the Orchid Bloom Lab YouTube channel for clear visual guidance on watering, root health, repotting, lighting, flowering and rescuing troubled orchids.
Subscribe at https://www.youtube.com/@OrchidBloomLab
Orchid Bloom Lab™
Science-Based Orchid Flowering Tips—Grow Better. Bloom More.