
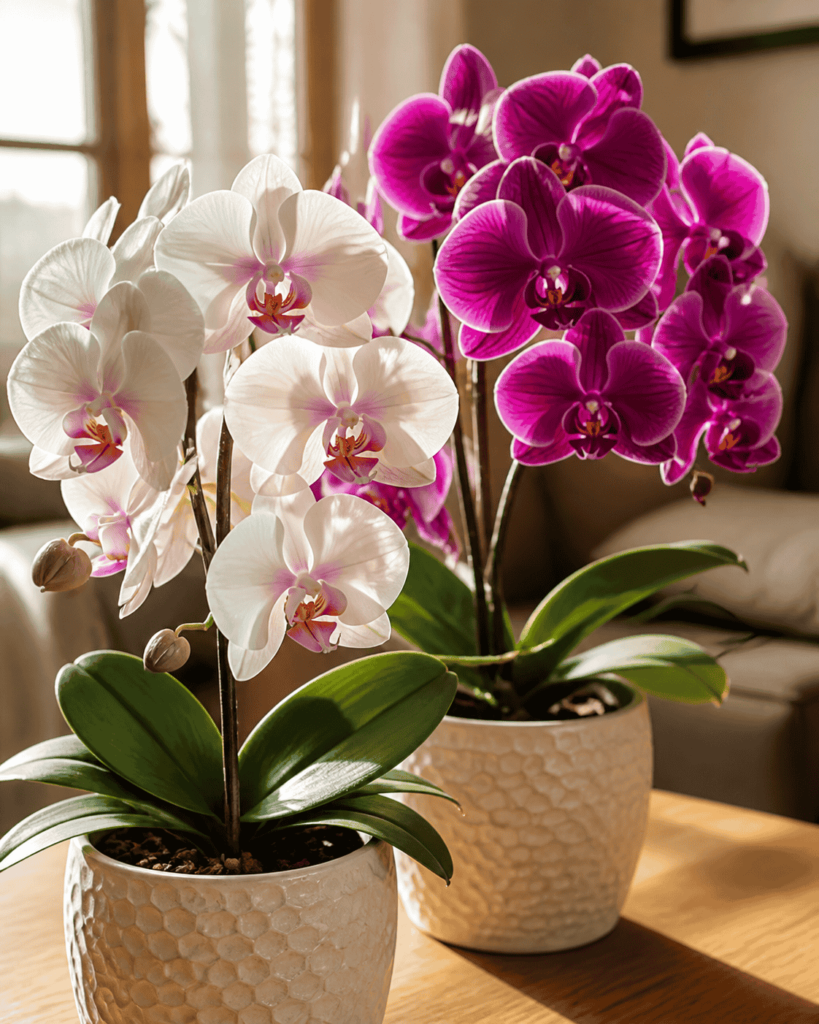
You notice a yellow leaf on your moth orchid.
Your first thought may be, “Is my orchid dying?”
Perhaps you reach for the watering can, fertilizer or scissors. But before doing anything, pause and examine the whole plant.
A yellow leaf on a Phalaenopsis orchid does not always mean there is a serious problem. One older bottom leaf will naturally turn yellow and fall as the plant grows. However, several yellow leaves, rapid color changes or yellowing accompanied by soft roots, spreading spots or crown damage can be warning signs.
The number, position, texture and speed of the yellowing provide important clues.
This guide will help you decide whether your orchid is simply replacing an old leaf or asking for help.
Quick Answer: Should You Worry About a Yellow Orchid Leaf?
You probably do not need to worry when:
- Only one bottom leaf is yellowing.
- The change is slow and even.
- The leaf remains reasonably firm at first.
- The other leaves are firm and healthy.
- New roots or a new leaf are developing.
- The crown is firm and undamaged.
- Most roots look healthy.
Investigate further when:
- Two or more leaves turn yellow at the same time.
- Yellowing spreads rapidly.
- A young or upper leaf turns yellow.
- The leaf becomes soft, wet or foul-smelling.
- Dark, sunken or spreading spots appear.
- The roots are brown, hollow or mushy.
- The crown or base of the plant is dark and soft.
- The plant is loose in its pot.
- Leaves are both yellow and badly wrinkled.
- You find insects, sticky deposits or white cotton-like material.
Do not diagnose the orchid from leaf color alone. Inspect its roots, crown, growing medium and environment before choosing a solution.
First, Understand How Phalaenopsis Leaves Grow
Phalaenopsis orchids grow upward from a central stem.
New leaves emerge from the crown at the top of the plant. As the orchid produces new leaves, the oldest leaves remain at the bottom.
A mature plant cannot keep every leaf forever. Eventually, an old bottom leaf contributes its stored resources back to the plant, turns yellow and separates.
This is natural leaf aging, also called senescence.
The important pattern is:
New leaves appear at the top while old leaves are gradually lost from the bottom.
If one lowest leaf yellows slowly while the rest of the plant looks healthy, the orchid may not require any treatment.
The Four Questions to Ask First
When you see yellowing, do not immediately add water or fertilizer. Ask four questions.
1. Which leaf is yellow?
A lowest, oldest leaf is more likely to be undergoing normal aging.
A young leaf near the crown deserves closer attention because young leaves should normally remain active and green.
2. How many leaves are affected?
One slowly yellowing bottom leaf may be normal.
Several leaves changing color together suggest a broader problem involving the roots, watering, light, temperature, nutrition or plant health.
3. How quickly is the yellowing spreading?
A gradual change over several weeks is less alarming than yellowing that develops or spreads within a few days.
Take a dated photograph. Compare it after two or three days to determine whether the affected area is stable or expanding.
4. What else is happening?
Look beyond color.
Check whether the leaf is:
- Firm or limp
- Dry or wet
- Smooth or wrinkled
- Evenly yellow or spotted
- Attached firmly or separating
- Normal-smelling or unpleasant-smelling
Then inspect the roots and crown. These observations are often more useful than the yellow color alone.
Quick Diagnostic Table
| What you observe | Likely possibilities | What to check next |
| One lowest leaf slowly turns evenly yellow | Normal aging | Check whether the rest of the plant is healthy |
| Several leaves become yellow and limp | Root trouble or prolonged overwatering | Inspect roots and potting medium |
| Yellow, wrinkled leaves | Dehydration or damaged roots | Check whether roots can absorb water |
| Pale yellow-green leaves on the exposed side | Excessive light | Examine light intensity and leaf temperature |
| A bleached patch that later becomes dry and brown | Sun injury | Check for direct midday or afternoon sunlight |
| Yellow leaf with soft, spreading dark areas | Possible bacterial or fungal problem | Isolate plant and monitor spread |
| Young center leaf turns yellow or pulls out | Crown or growing-point damage | Inspect the crown immediately |
| Yellowing after repotting or relocation | Environmental or root stress | Review recent changes |
| Yellow leaves with white deposits on roots or medium | Salt accumulation or root stress | Check fertilizer strength and water quality |
| Yellowing with insects or sticky material | Possible pest damage | Examine leaf undersides and joints |
| Lower leaves yellow while plant carries many flowers | Aging or plant stress | Inspect roots and overall plant strength |
| Entire plant looks pale but continues growing | Light, root or nutrition issue | Review all growing conditions |
This table provides possible directions, not a final diagnosis. Different problems can produce similar symptoms.
Cause 1: Normal Leaf Aging
Normal aging is the most reassuring explanation.
A typical aging leaf:
- Is one of the lowest leaves.
- Changes from green to yellow gradually.
- Yellows relatively evenly.
- Does not develop wet, spreading lesions.
- Eventually becomes dry or separates easily.
- Appears on a plant that otherwise looks healthy.
The orchid is withdrawing useful materials from the leaf before letting it go. Removing the leaf too soon may interrupt that process and create an unnecessary wound.
What should you do?
Usually, nothing.
Continue normal care and allow the leaf to detach naturally. When it is ready, it may come away with very little pressure.
Do not forcefully pull, twist or cut a leaf that is still firmly attached.
Cause 2: Too Much Water and Damaged Roots
Frequent watering does not directly turn a leaf yellow simply because water touched the plant. The more serious issue is what can happen around the roots.
Phalaenopsis roots need moisture and oxygen. When the potting medium remains wet for too long, air spaces can become restricted. Roots may weaken and decay.
Once roots are badly damaged, they cannot supply the leaves properly. The leaves may become yellow, soft or wrinkled—even though the pot is wet.
This creates a dangerous misunderstanding. The grower sees a limp plant, assumes it is thirsty and adds more water. The already-damaged roots remain wet, and the problem worsens.
Warning signs of root trouble
- Several yellowing leaves
- Limp or wrinkled leaves
- A pot that remains wet for many days
- A sour or stale smell
- Dark, soft or hollow roots
- Decomposed potting material
- A plant that moves loosely in the pot
- Water trapped inside a decorative container
What should you do?
Remove the clear inner pot from its outer container and inspect the roots.
Healthy Phalaenopsis roots are usually firm. They may appear green when hydrated and silvery or pale when drier. Some healthy roots may also be cream, yellow or brownish if they grew away from light, so color alone is not enough.
Dead roots are often soft, hollow, flattened or covered by an outer layer that slips away easily.
If the medium has decomposed or many roots are dead, the orchid may need repotting into fresh, airy material. Remove only roots that are clearly dead using a clean cutting tool.
After repotting, adjust your watering according to the new medium and the reduced root system.
Cause 3: Dehydration
An orchid may develop yellowing or wrinkled leaves when it cannot obtain enough water.
This can happen because:
- Watering is too infrequent.
- The potting medium dries extremely quickly.
- The roots have died from previous overwatering.
- The roots were badly damaged during repotting.
- The environment is unusually hot or dry.
- The plant has more leaves and flowers than its roots can support.
The key question is not simply, “Is the orchid thirsty?”
It is:
“Does the orchid have enough healthy roots to absorb water?”
A dry orchid with healthy roots may improve after proper watering. An orchid with a wet pot and dead roots will not be helped by additional water.
What should you do?
Inspect the roots and medium first.
If the roots are healthy and the medium is genuinely dry, water thoroughly and allow the pot to drain.
Do not try to correct long-term dehydration by leaving the orchid permanently soaking in water. Restore an appropriate wet-and-dry cycle and monitor new growth.
Older damaged leaves may not return to their original appearance even after the plant recovers. New roots and leaves are better measures of improvement.
Cause 4: Excessive Light or Heat
Phalaenopsis orchids need bright light to grow and flower, but strong direct sunlight can overheat their leaves.
Too much light may produce:
- Pale yellow-green foliage
- Bleached areas
- Yellow patches on the window-facing side
- Dry brown tissue within a damaged patch
- Leaves that feel unusually warm
- A sudden color change after relocation
Sun injury often affects the part of the plant facing the strongest light rather than yellowing every leaf evenly.
A plant moved suddenly from a shaded store or indoor shelf to a sunny window is particularly vulnerable.
What should you do?
Move the orchid away from harsh direct sunlight or soften the light with a sheer curtain.
Do not move it into a dark corner. The objective is bright, indirect light—not no light.
Damaged leaf tissue will not become green again. Leave it attached if it remains dry and stable. Concentrate on preventing further injury.
Cause 5: Insufficient Light
Too little light is better known for preventing flowering, but a severely shaded orchid may also become weak, dark green or sometimes generally pale.
Insufficient light reduces the energy available for root, leaf and flower production. A weak plant may lose older leaves faster than it replaces them.
What should you do?
Move the orchid gradually into brighter, indirect light.
If natural light is limited, consider a suitable LED grow light. Use a timer to provide a consistent light period and follow the manufacturer’s recommendations for distance.
Avoid making a sudden move from deep shade to intense sunlight.
Cause 6: Fertilizer or Mineral-Salt Stress
Fertilizer is useful, but more is not always better.
Strong or frequent fertilizer applications can allow salts to accumulate around the roots. Hard water may contribute additional mineral deposits.
Affected roots may lose their ability to function properly. The leaves can then become pale, yellow or weak.
Look for:
- White crusts on the pot or medium
- White deposits on roots
- Brown or damaged root tips
- A history of strong fertilizer use
- A medium that has not been flushed for a long time
What should you do?
Stop heavy feeding and flush the potting medium thoroughly with suitable water, allowing it to drain completely.
Resume fertilizer later at a modest concentration according to the product directions.
Do not apply extra fertilizer to a plant with badly damaged roots. Correct the root-zone problem first.
Cause 7: Nutrient Deficiency
True nutrient shortages can contribute to abnormal leaf color, but they should not be the first conclusion.
Yellowing caused by damaged roots, poor drainage or unsuitable pH can resemble a fertilizer deficiency. Adding more fertilizer will not help if the roots cannot absorb it.
Before assuming that the plant needs additional nutrients, ask:
- Are the roots healthy?
- Does the pot drain freely?
- Has the medium decomposed?
- Is the plant receiving sufficient light?
- Have I been fertilizing at all?
- Has salt accumulated in the pot?
Correct basic cultural problems before increasing fertilizer.
Cause 8: Temperature Stress
Phalaenopsis orchids generally prefer temperatures that people find comfortable.
Cold drafts, hot heating vents or sudden temperature changes can stress the plant. Leaves may yellow after exposure to:
- A cold window in winter
- Air-conditioning drafts
- Heating vents
- A hot vehicle
- Sudden relocation
- Chilling during transport
- Extreme heat near glass
Temperature injury may not become obvious immediately.
What should you do?
Keep the plant away from heating and cooling vents, cold drafts and hot window glass.
Provide stable conditions and avoid several additional changes while the orchid adjusts.
Cause 9: Repotting or Environmental Stress
Yellowing sometimes begins after repotting, moving house or bringing a new orchid home.
A change in light, humidity, temperature, potting medium and watering pattern can affect the plant simultaneously. Root damage during repotting can add further stress.
One old bottom leaf may be lost while the plant adjusts. That does not automatically mean the repotting has failed.
What should you do?
Check that:
- The crown was not buried.
- The pot drains properly.
- The medium is appropriate.
- Healthy roots were not unnecessarily removed.
- The orchid is stable in the pot.
- The new location provides suitable light.
- You are not watering the new medium as if it were the old one.
Bark and sphagnum moss dry at different rates. After repotting, learn the behavior of the new medium before settling into a routine.
Cause 10: Crown or Stem Trouble
Yellowing near the top or center of the plant deserves prompt attention.
The crown is where new leaves emerge. If water remains trapped there—particularly under cool, still conditions—the growing point may be damaged.
Possible warning signs include:
- A young center leaf turning yellow
- A center leaf that pulls out easily
- Dark or soft tissue in the crown
- Several leaves becoming loose near their bases
- An unpleasant smell
- Yellowing that begins near the stem rather than at a leaf tip
What should you do?
Keep the crown dry, isolate the orchid from other plants and prevent water from spreading between plants.
Crown and stem problems can be difficult to diagnose from appearance alone. If the damage is spreading, seek help from an experienced orchid grower, local orchid society or qualified plant-disease service.
Avoid applying several home remedies without knowing the cause. Unnecessary substances can damage healthy tissue or hide the progress of the problem.
Cause 11: Pests
Some pests feed on leaves and weaken the plant.
Look carefully for:
- White cotton-like material
- Small raised brown or tan bumps
- Sticky leaves or flower spikes
- Pale stippling
- Distorted new growth
- Fine webbing
- Insects hidden in leaf joints
Pests are often easier to see with a magnifying glass and bright light.
What should you do?
Separate the affected orchid from other plants.
Identify the pest before selecting a treatment. Inspect nearby plants as well, because insects may have already moved between them.
Follow the directions on any product carefully, including restrictions for indoor use. Test treatments on a small area when appropriate, and do not mix products unless their labels specifically permit it.
Cause 12: Disease
Not every spot or yellow area is a disease. Sun injury, cold damage, edema, fertilizer injury and physical damage can resemble infection.
Disease becomes more concerning when an affected area is:
- Expanding rapidly
- Soft or water-soaked
- Surrounded by a yellow margin
- Dark and sunken
- Appearing on several leaves
- Accompanied by an unpleasant smell
What should you do?
Isolate the plant and stop splashing water between orchids.
Photograph and mark the edge of the affected area so you can determine whether it is spreading. Keep the leaves dry and provide gentle air movement.
Because bacterial, fungal and non-infectious injuries can look similar, obtain a reliable diagnosis before applying a pesticide.
A Five-Step Yellow-Leaf Inspection
Step 1: Photograph the plant
Take one photograph of the whole orchid and close-ups of the affected leaf, roots and crown.
This provides a record for comparison.
Step 2: Identify the leaf’s position
Is it the oldest bottom leaf or a young upper leaf?
One old bottom leaf is more likely to be normal. Young-leaf yellowing requires closer investigation.
Step 3: Check the roots
Remove the inner pot from its decorative container.
Look for firmness, color, dead areas, excessive wetness and decomposed medium.
Step 4: Inspect the crown and stem
Look for trapped water, discoloration, softness or looseness where the leaves join the plant.
Step 5: Review recent changes
Ask what changed before the yellowing began:
- Was the orchid moved?
- Was it repotted?
- Did it receive strong sunlight?
- Did the temperature fall?
- Was fertilizer applied?
- Was it watered more frequently?
- Did it recently finish flowering?
- Was it transported home from a store?
The timing may provide the strongest clue.
Should You Cut Off a Yellow Orchid Leaf?
Not automatically.
If the leaf is yellowing naturally and remains firmly attached, allow the plant to finish withdrawing its resources. The leaf will eventually loosen or dry.
Remove a leaf only when there is a sound reason, such as diagnosed spreading damage or completely dead tissue.
If cutting is necessary:
- Use a clean, sharp tool.
- Avoid damaging the stem or crown.
- Keep your hands and work surface clean.
- Disinfect the tool before using it on another plant.
Do not tear through healthy tissue simply because the yellow leaf looks unattractive.
What Not to Do
Do not water immediately
Yellowing does not prove that the plant needs water. Check the roots and medium first.
Do not apply extra fertilizer immediately
A stressed root system may be unable to absorb fertilizer, and excess salts may cause additional damage.
Do not repot automatically
Repotting is justified when roots or medium require it. Unnecessary repotting can add stress.
Do not move the plant repeatedly
Changing locations every few days makes the orchid adjust again and again.
Do not use several treatments together
Multiple home remedies and pesticides can make the problem harder to diagnose and may injure the plant.
Do not remove every imperfect leaf
An older leaf can remain useful while it is still partly green and firmly attached.
Do not assume every spot is contagious
First consider light, temperature, physical injury, water balance and fertilizer. Isolate the plant if infection is genuinely suspected.
Frequently Asked Questions
Is one yellow bottom leaf normal?
Often, yes. One lowest leaf that yellows slowly and evenly on an otherwise healthy plant is usually part of normal aging.
Why are two bottom leaves turning yellow?
The plant may be shedding older leaves, but losing two together deserves closer inspection. Check the roots, watering history and recent environmental changes.
Why is a new leaf turning yellow?
Young-leaf yellowing is not typical aging. Inspect the crown, roots, light, temperature and growing point promptly.
Can a yellow orchid leaf turn green again?
A slightly pale leaf may improve if the cause is corrected early. A fully yellow leaf usually will not return to green.
Does a yellow leaf mean I am overwatering?
Not always. Overwatering and root damage are common possibilities, but aging, dehydration, excessive light, temperature stress, pests and other problems can also cause yellowing.
Can underwatering cause yellow leaves?
Yes. However, an orchid can also look dehydrated because its roots have decayed. Inspect the roots before watering more frequently.
Should I pull off a yellow leaf?
No. Allow a naturally aging leaf to detach when it is ready. Pulling a firmly attached leaf can damage the plant.
Why did the leaves turn yellow after flowering?
Flowering uses plant resources, but a healthy orchid should not collapse after blooming. One old leaf may age naturally. Multiple yellow leaves justify checking the roots, light and overall condition.
Why did my orchid turn yellow after I brought it home?
The plant may be responding to changes in light, temperature, humidity or watering. It may also have hidden root problems from conditions before purchase.
Should I repot an orchid with yellow leaves?
Repot only if inspection reveals damaged roots, decomposed medium, poor drainage or another clear reason. Yellow leaves alone do not prove that repotting is necessary.
The Most Important Lesson
A yellow leaf is a symptom, not a diagnosis.
The safest response is not immediate treatment. It is careful observation.
Start with these three questions:
- Is it one old bottom leaf or several leaves?
- Is the change slow and dry or rapid and soft?
- Are the roots and crown healthy?
If one lowest leaf is gradually yellowing while the plant produces healthy roots and new growth, let nature take its course.
If several leaves are changing, the roots are failing or the crown is affected, investigate promptly.
Learning to tell the difference prevents two common mistakes: ignoring a serious problem and overreacting to a normal leaf.
Your Phalaenopsis communicates through changes in its roots, leaves and growth. The better you learn to read those signs, the more confidently you can care for it.
Join the Orchid Bloom Lab email list to receive practical, science-based orchid care guidance and downloadable diagnostic resources. You will learn what to inspect, what the signs may mean and what to do next—without relying on guesswork.
Join the email list at https://orchidbloomlab.com
You can also subscribe to the Orchid Bloom Lab YouTube channel for clear visual guidance on watering, root health, repotting, lighting, flowering and rescuing troubled orchids.
Subscribe at https://www.youtube.com/@OrchidBloomLab
Orchid Bloom Lab™
Science-Based Orchid Flowering Tips—Grow Better. Bloom More.